At work, we’re primarily a windows shop. Everything is based on Active Directory. I manage lab resources for my group, and provide some file sharing and web services independently from our global IS group. The easiest way to do is to let people authenticate with the credentials they already have (their domain login).
This is pretty easy for web services. For example, most web frameworks support connecting to LDAP and authenticating a user. It’s also easy if you have a Linux machine (via nss-pam-ldapd). It’s relatively difficult to have a non-domain computer authenticate a user against Active Directory.
This is mostly a problem of finding the right search terms. pGina is an open source, pluggable authentication provider for Windows. If you come from a Linux background, the easiest way to think about this is PAM for Windows.
With that (brief?) introduction, I’ll spend the rest of this post laying out how to use pGina with an Active Directory service.
Step 1: Installation
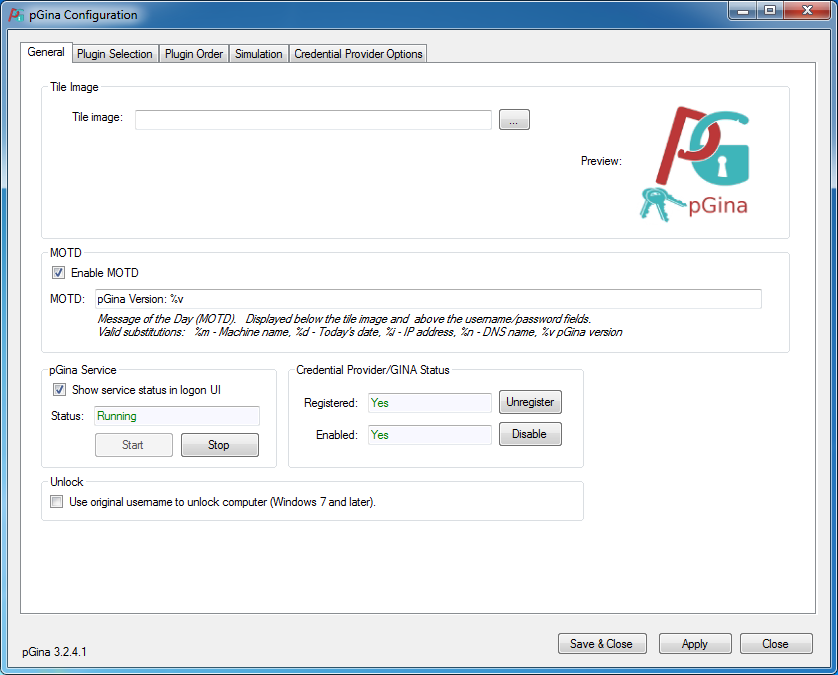
First, download pGina from the downloads page. When installation is finished, you’ll have the option to launch the pGina configuration tool.
Step 2: Configuration
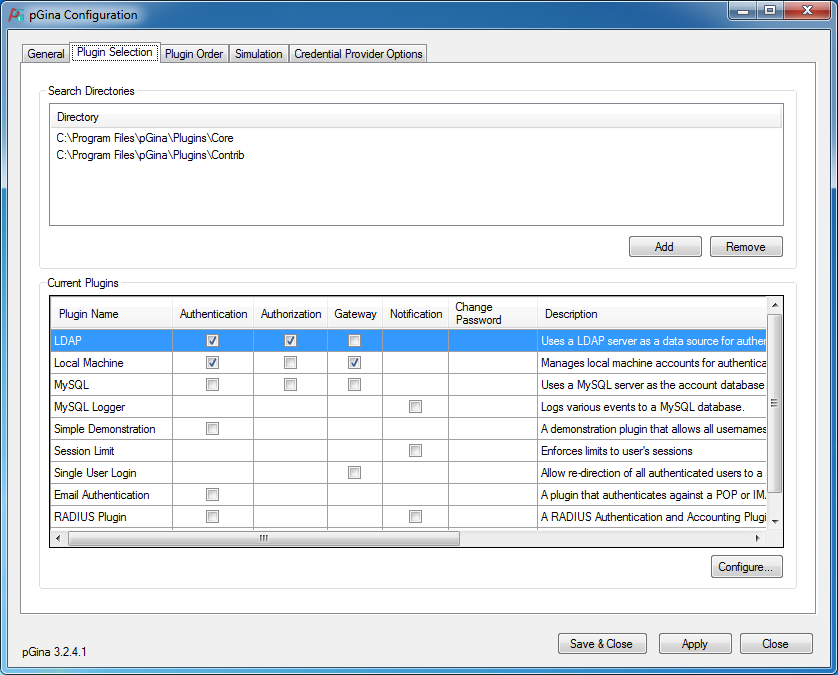
Click on the “Plugin Selection” tab in the configuration tool and check the “Authentication” and “Authorization” checkboxes. Then, make sure that the LDAP row is selected and press “Configure…”.
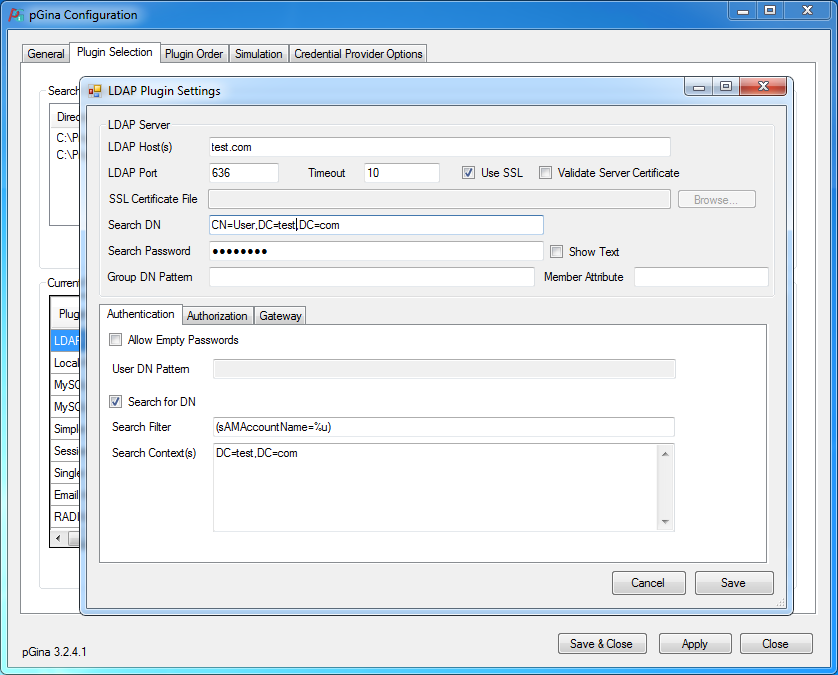
This is where the meet of the configuration is done. You’ll need to fill in the following fields:
- LDAP Host: This is your Active Directory server
- LDAP Port: use 636 and select “Use SSL” to encrypt the connection. If your domain is part of a forest, you may need a different port number.
- Search DN: This is the distinguished name for a login that will be used to search active directory. I have a service account in our Active Directory whose password doesn’t change.
- Search Password: The password for the “Search DN” user.
- Check the “Search for DN” check box
- Set the Search filter to
(sAMAccountName=%u). sAMAccountName is typically an easy-to-remember user name.%uis what the user will type into the login field. - Click “Save”
If you need help finding the distinguished name for an account, I recommend using AD Explorer from SysInternals.
Step 3: Testing
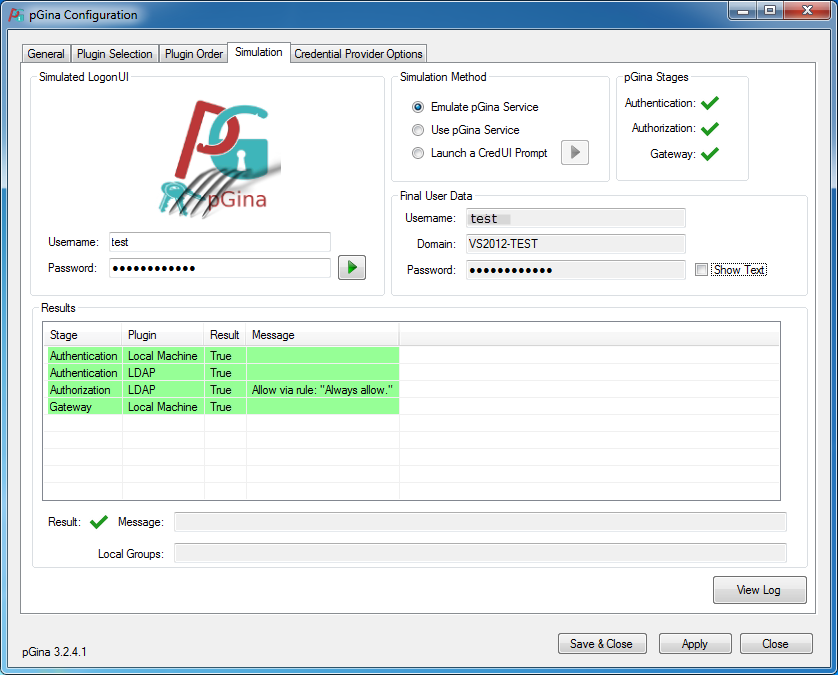
This is the moment of truth! Select the “Simulation” tab, put your domain username and password into the appropriate text boxes, and the press the “go” button (the one with the green triangle).
The first time you do this, the first stage (Authentication via the Local Machine plugin) will evaluate to False. This is because that user doesn’t exist on your local machine. pGina adds them as a local user so that subsequent runs will authenticate against the local user.
A second test. Log out from your machine and select “Switch User.” Your login screen should now look like this:
The pGina login item should say “Service Status: Connected”. If it does, click it and login!
Final Notes
I primarily use this to give domain users access to SMB shares and remote desktop on non-domain windows machines. So, there are some caveats:
- This computer doesn’t belong to the domain. Windows seems to match
sAMAccountNameon your domain PC to the login on your non-domain PC. So, it should authenticate properly. - Users have to login on the console before you can grant SMB access or let them authenticate via Remote Desktop. If you want to authenticate new users over RDP, you can do so by following the advice in this thread.
- I haven’t tested password changes — I’m pretty sure this will break if your domain password changes (likely, the old password will still work).
There’s a fork of pGina that has some additional features. You may want to look at that to see if there’s something useful.


